Step by Step to Setup Bitnami WordPress Instance in Amazon
I already have my dinner at 10 pm in my beautiful country of Nepal. Yet my appetite is still not satisfied until I finish this blog. And it’s a blog I’ve been planning after 6 years, you know what I mean.
Amazon Lightsail is the easiest way for developers who only need virtual private servers and WordPress in particular to get started with AWS. Lightsail provides everything you need to quickly start your project–a virtual machine, SSD-based storage, data transfer, DNS management, and a static IP–at a cheap, reliable price.
“I like that when I open a Bitnami program, I don’t have to think about the minute. It only works!”William Shatner / Fan Club William Shatner.
This guide will hold your hand with the Bitnami WordPress Stack as you begin your journey. It will direct you through some important first steps, such as finding your WordPress credentials, changing the language of the default app, making your first post, and saving your WordPress details.
Assumptions and preconditions
The guide assumes:
You’ve used the AWS Marketplace to launch Bitnami WordPress. If you don’t know how to do this, our handy guide will lead you through the steps to get started with AWS Marketplace Bitnami applications.
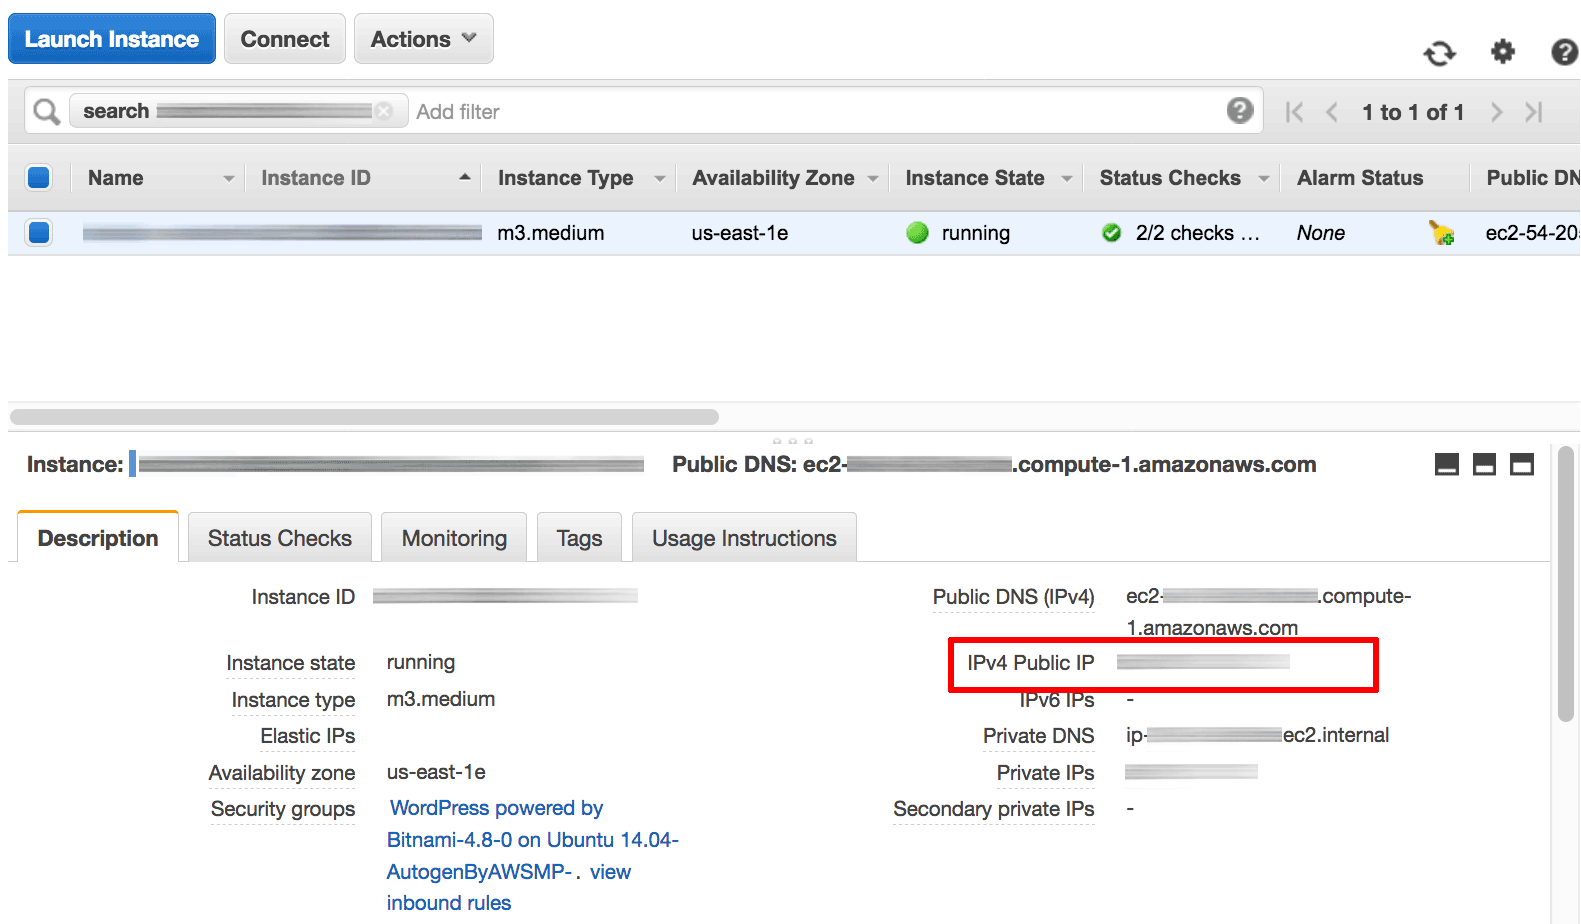
You received your WordPress server’s public IP address from the AWS EC2 Console.
If not, use the picture below as a guide to find the public IP address of your server.
Get WordPress credentials The bulk of your WordPress contact can take place via the WordPress Dashboard.
You will need a username and password to sign in to the Dashboard. The Bitnami WordPress Stack is configured by default with the following credentials:
username: user
Password: randomly generated
To access the password, follow these steps: sign in to the AWS EC2 Console.
Select the menu item “Instances-> Instances” from the left navigation bar.
Choose your example.
From the drop-down menu of “Actions,” pick the menu item “Get Process Log.”
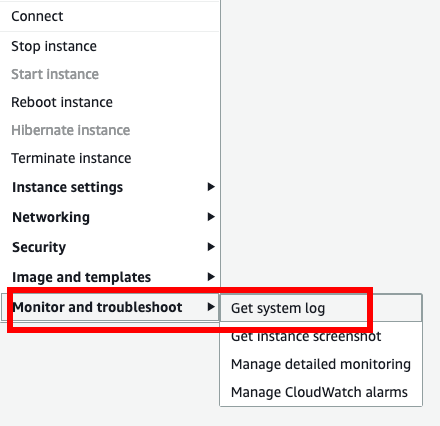
Review the system log until you find a message with the application username and password.
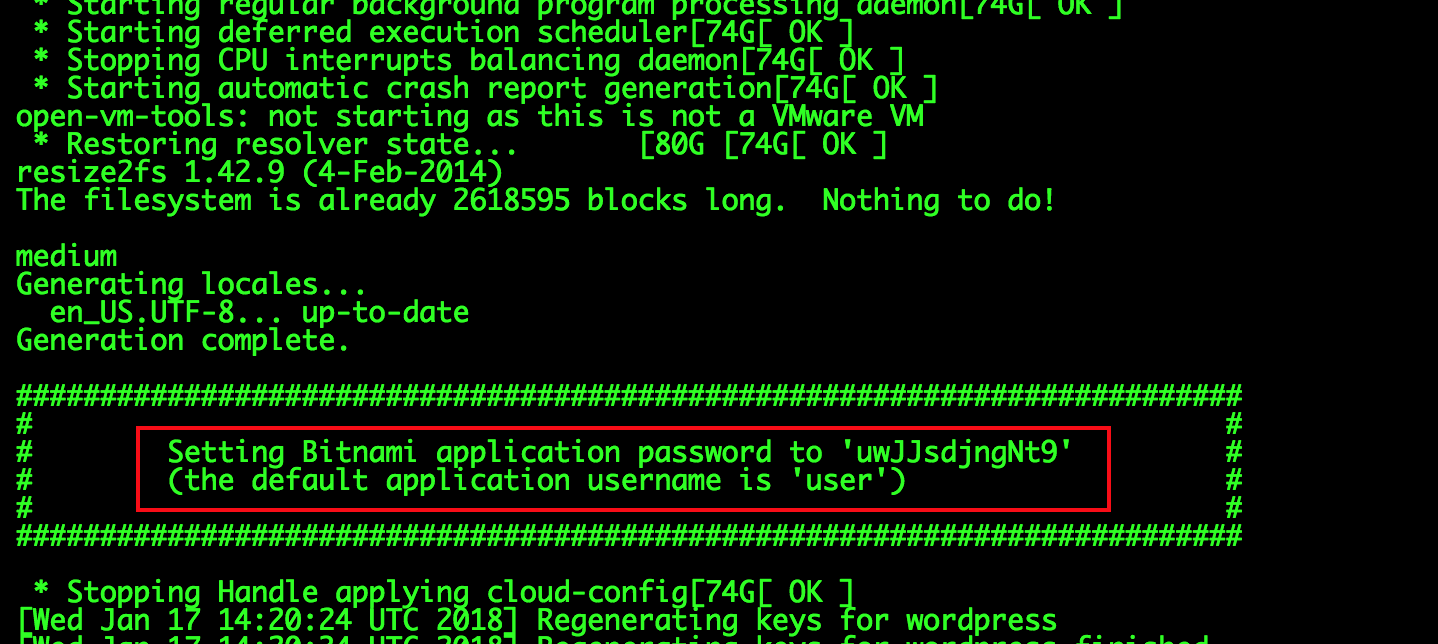
This password is only displayed when you start the image for the first time. Save in a safe place, please.
TIP: By testing the bitnami credentials file as defined in the FAQ, you can also get the username and password at any time.
Login To login to the WordPress Dashboard, follow the following steps: go to the http:/SERVER-IP / wp-admin URL, where SERVER-IP is your server’s public IP address.
Type the previous section’s username and password.
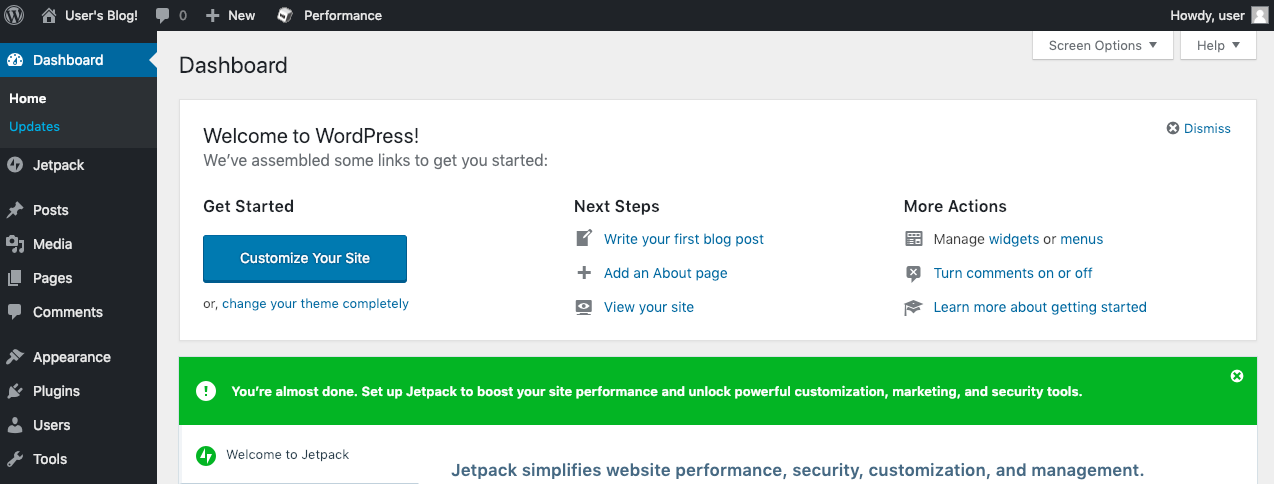
You should now arrive at the WordPress Dashboard that allows you to manage posts, pages and comments; customize your blog with themes and plugins; import and export content; control navigation menus; add or uninstall new user accounts; and much more.
Switch User Interface Language of WordPress By default, the user interface of the Dashboard must appear in English. Nonetheless, you can easily switch it to use another language following these steps: press the menu item “Settings-> General” in the left navigation bar.
Scroll down and select a different language to the “Site Language” area.
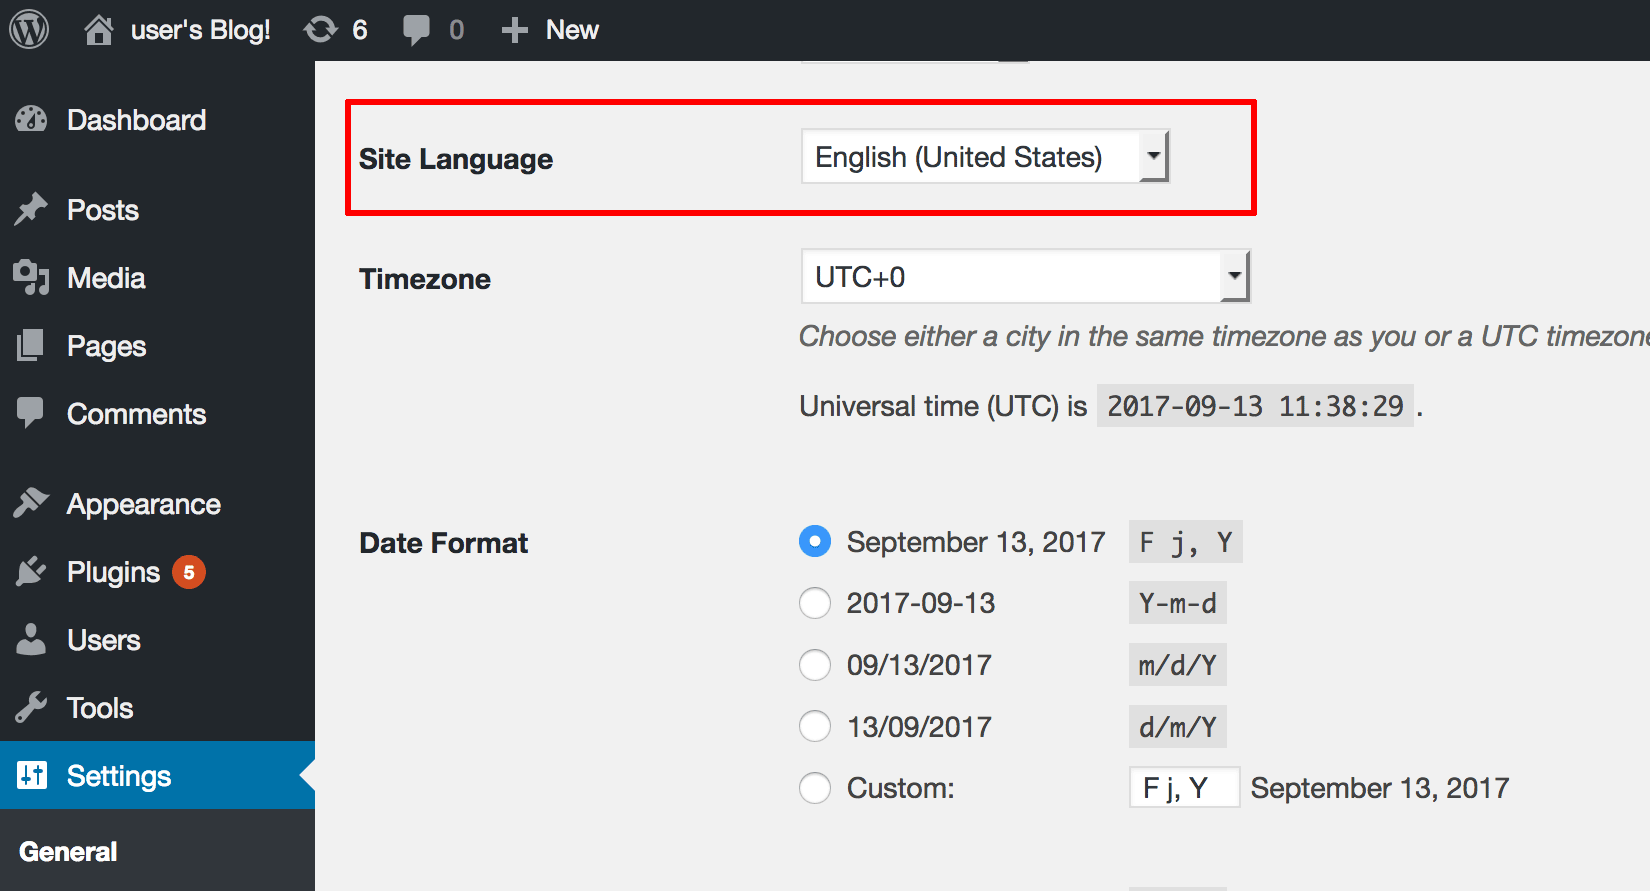
To save your changes and update the language of the app, press “Save Changes.”
Adjust WordPress Administrator Password It is highly recommended that you adjust the WordPress Dashboard’s randomly generated password. Once logging into the Dashboard as the WordPress administrator, follow these steps to update the password: pick the username icon in the top right corner and click on the link “Edit My Profile” in the dialog.
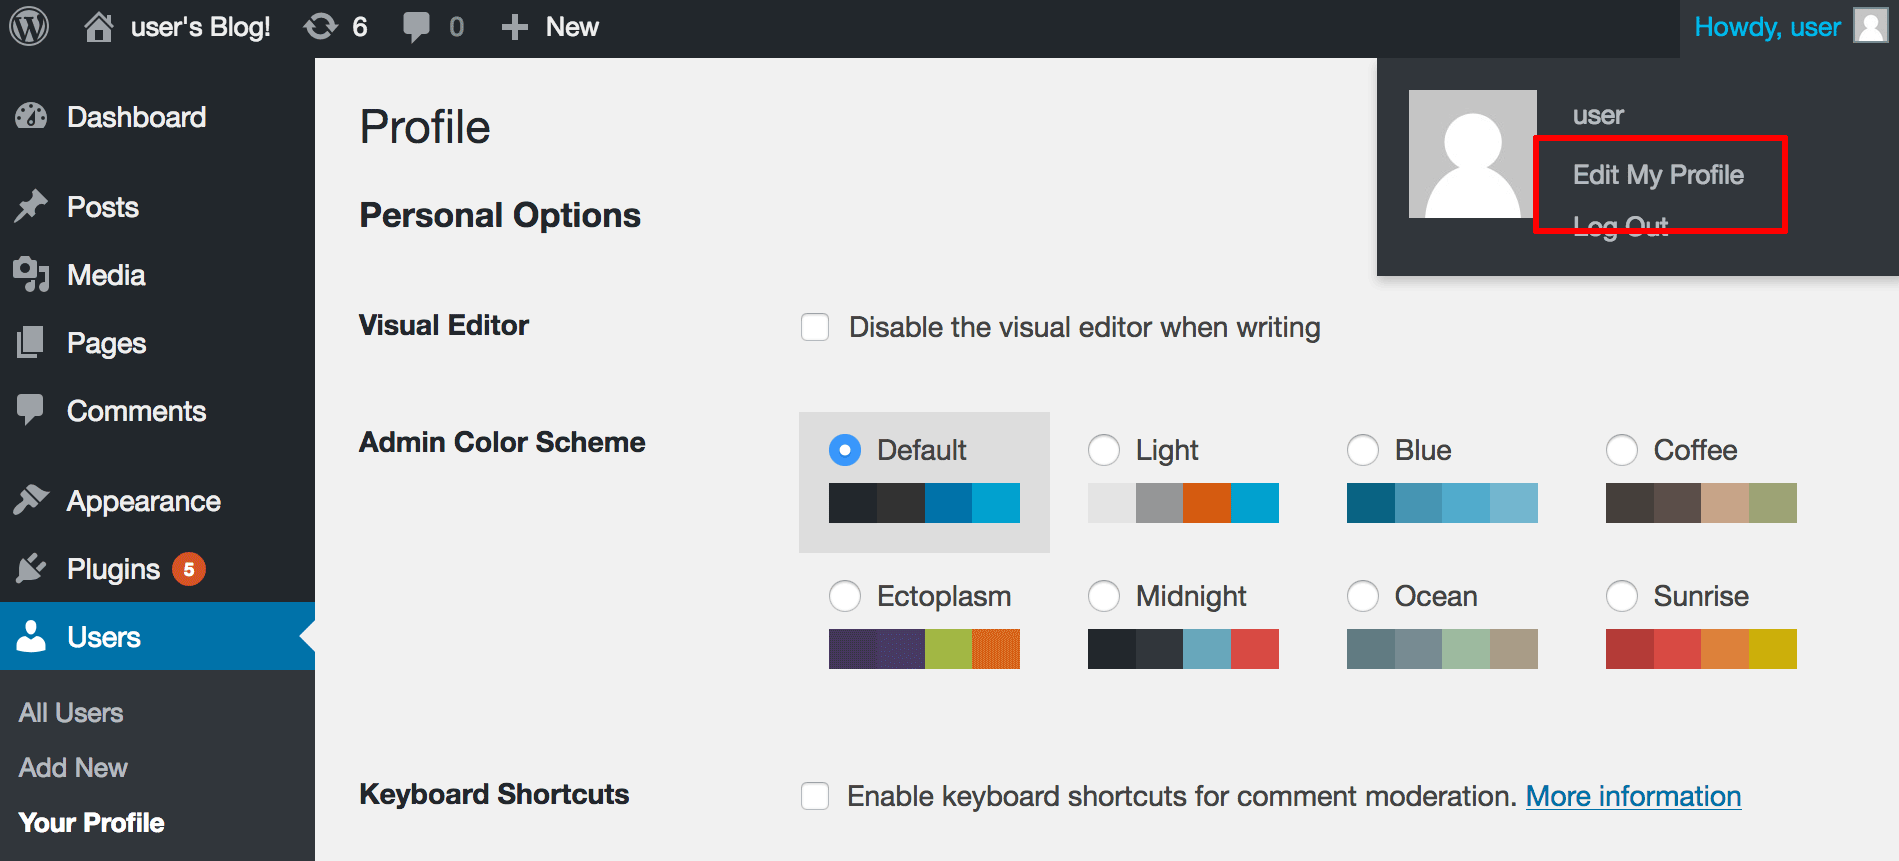
See the “Account Management” section on the resulting profile page and click “Generate Password.”
To save the new password, edit the created password as necessary and click the “Update Profile” button.

Delete The Sample Post And Page By default, a sample post and a sample page are installed in WordPress. You can uninstall this sample content as follows before you can start making it your own: log in to the WordPress Dashboard using the administrator account (if you’re not logged in already).
Navigate to segment “Comments.”
Select the sample post and click on the link “Trash” in the sub-menu below.
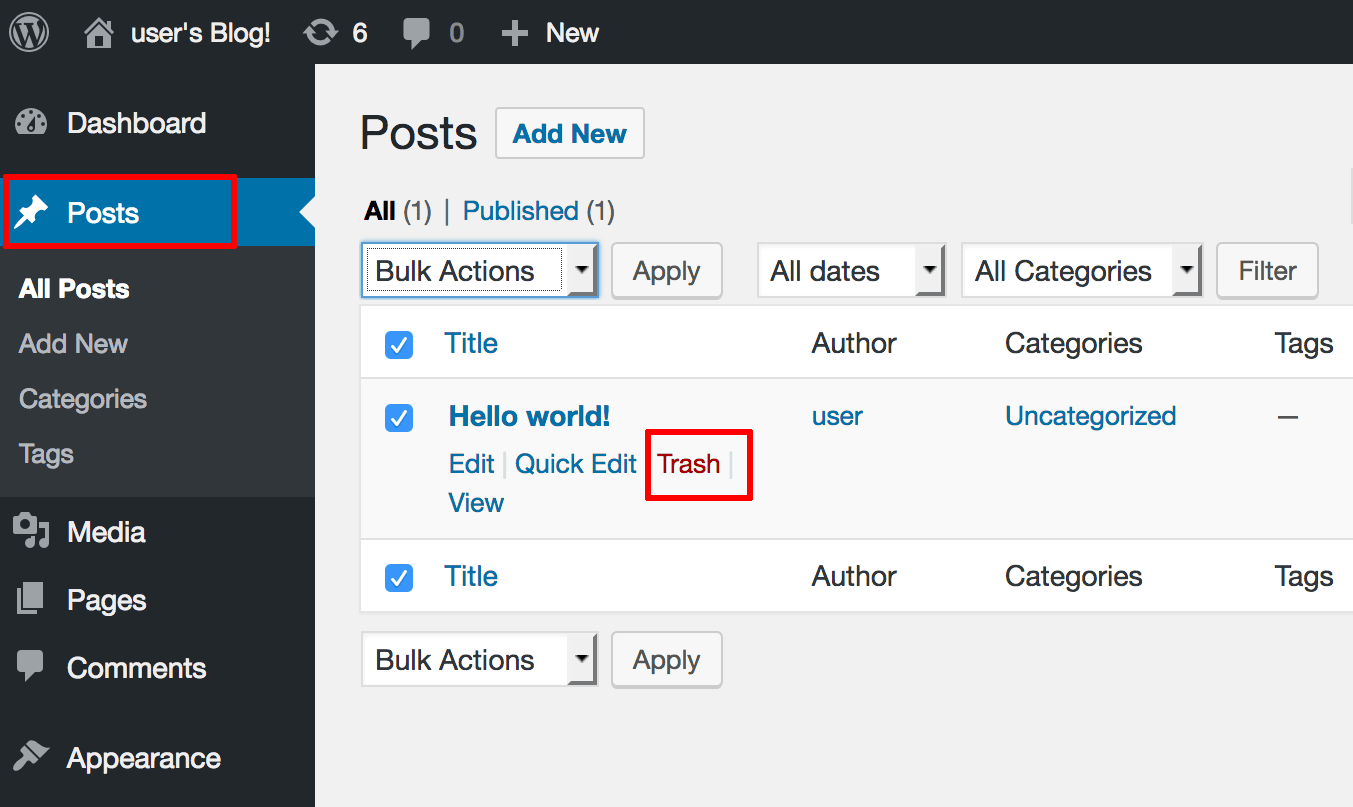
Navigate to the section called “Pages” and do the same for the sample tab.
You should now have a clean slate and your own posts and pages will begin to be built.

Leave a Reply
You must be logged in to post a comment.